Thursday, December 27, 2012

EASY STREET STEP FIVE

Doing Step five of this mystery kept me smiling.  Why? Because every time I thought "Number Five" I thought of one of my favorite movies, "Short Circuit".  The Star, the robot is called #Five.

Due to extenuating circumstances I wasn't able to finish this step till today.  Bonnie stated we weren't going to have anymore "Flying Geese". When I completed the first unit I looked at it and said if you aren't a "Flying Geese", you must be a "Sitting Duck"
(because of the fat derrier).  

I am still not comfortable with my choice of fabrics for this quilt. 

I used the Brown/Gold as a substitute for Bonnies Aqua.  I used 5 strips plus 14 inches LOF to make my 64 squares which were 3.5 inches.

My purple substitute is the Paisley.  I used 6 strips plus another 4 inch piece for the 128 two inch squares.

This is my unit.

If you haven't found "Easy Street" yet,
you'll find your way by going here:

I have other blogs with different subjects.
Where I have stories of my cats and other pets 
a blog about my courtship with my husband,
and a blog about my most embarrassing moment.
A "Soap box" blog where I do air my opinions.

blogs about the wildflowers on our farm
Organic methods we use, some cooking and some poetry
4 New blogs Feb 16-19 about Seeds sprouting, insects, and garden pictures
New Blog about an endangered beneficial beetle


All recipes, pictures, and writings are my own. 
I give credit for items which belong to other people in my blogs .
Please do not copy without permission

Thursday, December 20, 2012

EASY STREET MYSTERY STEP ONE

EASY STREET MYSTERY
by BONNIE HUNTER
My journey down her street.

It was a real bumpy ride for the first quarter mile.  It's my own fault.  I couldn't find the right direction for me.  I had decided to get to the end of the journey my own way.  I wasn't fueling up with bits and pieces but with full leaded yardage.  I didn't have the color additives she was using,  I needed to find a substitute.  I have an extensive stash, I thought it would be "Easy" to substitute.  Every thing I chose, I didn't have enough quantity for each step.
These are the fabrics I chose:

STEP ONE
With a trepadacious beginning I proceeded to cut Step One.  We are to construct (192) 4 Patches.  Using A fabric (she calls her "constant").  Bonnie's is grey.  Mine is the beige which doesn't have white in it.  She is pairing it with her black and white bits and pieces.  I am using the beige flower on white for my background through the entire quilt.

Since I am using Yardage I cut 19 Strips of each fabric.  Then proceeded to stitch the strips together in pairs. 
The strips give me 21 "twosies" for each strip. 
The resulting 4 Patches:

Bonnie has the steps to complete your 4 patches but I am going to put a tutorial just incase someone is viewing this that isn't doing the mystery.  doing a four patch this way makes less bulk in your finished quilt top.

CONSTRUCTING A FOUR PATCH:  I used different fabrics for these samples.

1.  Place your strips, fronts of fabric together. (Have strips pressed and free of wrinkles.)
2. Stitch your paired strips 1/4 inch from the edge.  Open out and press the seam to the dark.  (If you don't press to the dark your resulting 4 patch will not open out with less bulk.)
3.  Cut  your strip set into twosies.
4.  Join your twosies, nesting the seams.  Place them under the presser foot with the dark fabric leading.  This is very important so it will finish with less bulk in the center.
5.  Open out your stitched twosies, do not press down.  The junctions of the seams, give them a little twist and pop the couple of stitches.  When you do this you will be able to fold out the seams, resulting in a miniature 4 patch.  Your four patch will lie flat and not be  heavy to quilt through.
    
While getting ready to post this blog I counted my four patches and realized I only had 189.  I had to make 3 more.  Please be sure to count your units at the end of each step.  You don't want to come up short.

If you haven't gone to "Easy Street" and would like to, this is the link:

Stay Tuned for my Step # 2.  I will post a link here when I get it posted.


If you enjoyed perusing this blog,
 I have other blogs with different subjects.

Where I have stories of my cats and other pets 
a blog about my courtship with my husband,
and a blog about my most embarrassing moment.
A "Soap box" blog where I do air my opinions.

blogs about the wildflowers on our farm
Organic methods we use, some cooking and some poetry
4 New blogs Feb 16-19 about Seeds sprouting, insects, and garden pictures
New Blog about an endangered beneficial beetle

All recipes, pictures, and writings are my own. 
I give credit for items which belong to other people in my blogs .  Please do not copy without permission


Wednesday, August 8, 2012

STEALING TIME

I don't sit and watch the clock, but I hate things which steal time.  I have been known waste time.  I would rather steal time when I choose, doing what I like and maybe it is nothing, someone might say I am wasting time.  It is not the same as having time stolen from you.  This week we have had time stolen from us twice.  We watched two movies which had no redeeming values at the end and both were very depressing.
I used to hand piece when I sat and watched TV.  The last week I haven't been able to do that (in fact for several months I haven't done that).  I totally wanted to vegetate.  During previous Television/riding in cars/sitting in doctors offices, I salvaged my lost time by piecing the following quilt top.
        INTRODUCING TREASURED TIME TOO
In the blog I said I would probably start another "Time Treasured" Quilt.  I did!  I worked on it for a while and then when traveling and family visiting started, I put it away.  On the second bad movie I pulled it out.  I am so glad I did.  I had forgotten how relaxing it was.  I have completed  eight sections of the 10 in a long row.  This is the quilt as it is now without the work I did last night.  I made some changes in it's construction.  The squares are rectangles are 5 inches not 4 1/2. Why the change?  Because I have a zillion 5 inch charms.  I'm not  being particular that there are to be no repeats in the fabrics. 
I hope you decide to treasure your time with a hand pieced treasure.  When I look at the other one I am incredulous that I made it.  Then I remember the hours I rescued piecing it.  this New version is giving me the same satisfaction.  It also brings to mind the treasured memory of the friend I met on the Internet who introduced me to hand piecing. 
 
 New Article on my blog: 
"A MYSTERY IN THE MAKING"
A mystery quilt designed with the novice in mind
 
Other blog sites by me:
 
Where I have stories of my cats and other pets
a blog about my courtship with my husband,
and a blog about my most embarrassing moment.
A "Soap box" blog where I do air my opinions.
 
blogs about the wildflowers on our farm
Organic methods we use, some cooking and some poetry,
blogs about Seed sprouting, insects, and garden pictures
Blog about an endangered beneficial beetle
New Blog:
 
All recipes, pictures, and writings are my own.
I give credit for items which belong to other people in my blogs .
Please do not copy without permission

Thursday, February 23, 2012

WARM WISHES QUILT


WARM WISHES 
free pattern
https://tinyurl.com/2y7ewmya


A friend emailed she was going to make a quilt using the "Warm Wishes" pattern.  She commented how each quilt looks ,different according to what fabric you use. 

Warm Wishes is a fall back pattern  for me when I need a quilt quick.

I love you can feature  specialty fabrics because  the pattern frames the blocks, unless you choose wrong in the framing fabrics.  The Quilt on the left is an example of my poor choice.  Or was it a poor choice?  I didn't notice till the quilt was going together that the large black strip in the middle destroyed the framing.  I had thought I did great framing the blocks with green.  When I finished and looked at the quilt I realized the black hadn't taken the roll of background behind the framed blocks.

I added the yellow in the border to draw the eye away from what I considered a mistake in my design


The quilt on the right is the first warm wishes quilt I made.  It was for my grandson.  The fabric is fireman fabric. I used what I had in the stash to make.  To add a little personality to it I pieced the ladders in the border, repeating the ladders in the fabric. 

You can see the definite framing of the blocks in this quilt.


In the following blog I wrote about the pattern you  can see how what you choose to use for the rails effects the outcome.     http://gloriouscreations.blogspot.com/2011/02/three-wishes.html

This quilt is the fist time I ever pieced with flannel.  I used what fabrics I had.  I let the yardage of the fabric dictate where they would be used.  (You'll also note on the right hand side there is not a finish framing.  I wanted to use all the blocks I made and this was what came of it.


I have used the pattern to make a small commemorative quilt. http://gloriouscreations.blogspot.com/2011/03/warm-wishes-again.html


This is my grandaughters quilt.  I found when you use a color in the narrower sash that is in the background of the block it tends to melt into the quilt loosing the framing look.

Left is the most recent quilt I made witth this pattern.  It is flannel, made for a young lady who loves purple.   This is another quilt I let the yardage dictate where I used what.  I wanted to clear the stash of the pink flannel.

I have made other Warm Wishes Quilts and not taken their pictures (they were picture worthy but camera wasn't handy before they were gifted). 


Please try this pattern in flannel.  The quilt is very soft and warm.   I recommend this pattern to a novice piecer (don't forget to pre-wash your flannel in hot water to shrink and tighten the weave.)  The use of a walking foot is highly recommended when using flannel.


A Warm Wishes Quilt,
made with love, being loved.

 New Article on my blog: 
"A MYSTERY IN THE MAKING"
A mystery quilt designed with the novice in mind
 
Other blog sites by me:
 
Where I have stories of my cats and other pets
a blog about my courtship with my husband,
and a blog about my most embarrassing moment.
A "Soap box" blog where I do air my opinions.
 
blogs about the wildflowers on our farm
Organic methods we use, some cooking and some poetry,
blogs about Seed sprouting, insects, and garden pictures
Blog about an endangered beneficial beetle
New Blog:
 
All recipes, pictures, and writings are my own.
I give credit for items which belong to other people in my blogs .
Please do not copy without permission

Monday, February 20, 2012

A WEDDING DRESS FOR BARBIE

When Barbie decides she is getting married her dress will have to be sophisticated, romantic, and very feminine.  It won't be a short modern one, or something with so much lace she would feel like Queen Victoria.  I have designed a dress for a demure sweet Barbie. 


Every bride's ensemble begins with how she feels.  She wants lingerie which is too special to use for any other occasion.  She wants to feel special from the inside out. 

The slip doesn't need to be mundane.  We have "something blue" in the ribbon lace around the hem.   The lace in the slip is from her grandmother's wedding dress. The dress was too small to alter to wear.  She wanted to use  the lace some way in her dress.
Matching panties with a blue ribbon garter complete the lingerie ensemble.  Barbie's dress has a self bra in it so she doesn't need a separate bra.


Her veil needs to be something she will feel Queen for the day wearing.  It needs to envelope her giving her a mysterious feel and illusion.  It needs to say, "She's special", to anyone viewing her.  To give her veil a special meaning her head piece was made with a broken strand of pearls from her grandmother. the extra pearls were strewn over the rest of the veil.

Some of the pearls were incorporated into her bouquet.  White Roses remind her of the climbing rose bush in her grandmothers garden.


Barbie's dress is simple.  She chose ice white satin to highlight the use of the lace from her grandmother's dress.  She used the pearls from gram's necklace on her bodice.  Barbie is well endowed but she doesn't flaunt it.  She needs a dress that acknowledges that fact with out distorting or putting on display the feature. 


Barbie has taken time to put on her dress.  The back is very plain because she has beautiful wavy tresses which will be covering it up.  The lace from Grams dress is tastefully used around the base of the gown.

Barbie's Gram is not able to attend the ceremony but she will be there walking down the isle with Barbie.

A BEAUTIFUL BARBIE, READY TO WALK DOWN THE ISLE. 
Barbies clothes were made from a discarded wedding dress and a broken string of pearls..

 New Article on my blog: 
"A MYSTERY IN THE MAKING"
A mystery quilt designed with the novice in mind
First Clue to be presented October 16.
 
Other blog sites by me:
 
Where I have stories of my cats and other pets
a blog about my courtship with my husband,
and a blog about my most embarrassing moment.
A "Soap box" blog where I do air my opinions.
 
blogs about the wildflowers on our farm
Organic methods we use, some cooking and some poetry,
blogs about Seed sprouting, insects, and garden pictures
Blog about an endangered beneficial beetle
New Blog:
 
All recipes, pictures, and writings are my own.
I give credit for items which belong to other people in my blogs .
Please do not copy without permission

Sunday, February 19, 2012

FOR THE LOVE OF DOLLS

"A SELF PORTRAIT DOLL"
I'm not even close to being an expert doll maker or clothier.  I do have fun with the craft.  I wish I'd taken pictures of the doll clothes I've made and the dolls I've dressed and the dolls I made.  Not to mention the bears and sock monkeys I've made.  You see it was the sock monkeys I blame for any other dolls I made or dressed. 

To be completely honest the obsession came when I was taught to sew at  three years old.  My mother started me with a running stitch and I made a tee shirt for my "Tiny Tears" doll.  It progressed to learning how to embroider a lazy daisy stitch and a stem stitch on the items I made.  When I was six maybe seven, I know I was in school and it was before I was in the 3rd grade I was given a real sewing machine.  It was portable and in a red leather case. I have no idea what brand it was or where it is now.  But it was real.  It had a foot pedal on the floor.  I  have to say it was my very favorite gift I ever received.  I  don't remember anytime making stuff with it but I do remember the day I broke it, somehow the needle jammed.  I know now that it knocked the timing off in the machine   That was the last time I ever used it and I have no idea what happened to it after that. 

I do know the thrill my granddaughter experienced when she was totally surprised by her machine when she was 6.  I remember the moment I was given mine.  Through the years I dressed my Ginny dolls and my Toni doll. Because I no longer had a machine I did them by hand.  When I was eleven My mother bought a portable Singer with boxes of cams.  At that time she was expecting my youngest sister and she never had time to take the lessons to use the machine.  She told me to go take them.  I felt so grown up walking into the classroom with all the adults (I even took the city bus to get to the store).  There were 10 students.  The instructor told us to pick out a pattern and make an out fit.  There would be 10 lesson/sewing sessions and  at the end of the lessons there would be a fashion show and awards given out.

Mom and I went shopping at Penny's.  Back then they had a fabric department.  This was the beginning of my fabric addiction.  I was in heaven despite the headache I had when I left.  I know now it was the formaldehyde in the fabric.

Now most of my sewing time is spent piecing quilts. 

I dug through my pictures on the puter and found two dolls I rescued from the trash and dressed.  I remember the handful of cream rinse I had to use on their hair to get it combed out and The bottle of fray check I used making their clothes. 
This Doll on the left I called "The Asian Diva".   Her Dress was made from the lining of a 1930 mens wool suit.  The dress and coat were lined with tafetta from another old dress. If you look close you will see a miniature "frog" at the waist.  I made it using a large needle.

The doll on the right I called "Valentine Blondie".  Her dress was the wade from the top of a cocktail dress from the 40's.  The over skirt was an organza type fabric from a hat of the same era.  Her necklace is from beads of that era.  Both dolls went to new homes quite a while ago.    Both dolls have underpants and a bra on.  The bride in the background I still have and will have to take a picture of her. 

I don't think I ever out grew my love of dolls.

Other blogs I write:
Where I have stories of my cats and other pets 
a blog about my courtship with my husband,
and a blog about my most embarrassing moment.
New Blog Feb 17 on label reading.

blogs about the wildflowers on our farm
Organic methods we use, some cooking and some poetry
4 New blogs Feb 16-19 about Seeds sprouting, insects, and garden pictures

All recipes, pictures, and writings are my own. 
I give credit for items which belong to other people in my blogs .  Please do not copy without permission

GRAMMY'S JAMMIES

Sewing for the grands for me was limited to quilts, or so I thought.  I never seemed to pick the correct style, size, or color when I decided to make wearing apparel for the kids.  A couple of years ago the kids came for a visit over Thanksgiving (they live in Florida).  I knew they didn't have PJs for cold weather.  I told my daughter not to pack any sleeping clothes, I would have them here for the kids.  It was a good decision.  It decided to snow the day after they arrived.

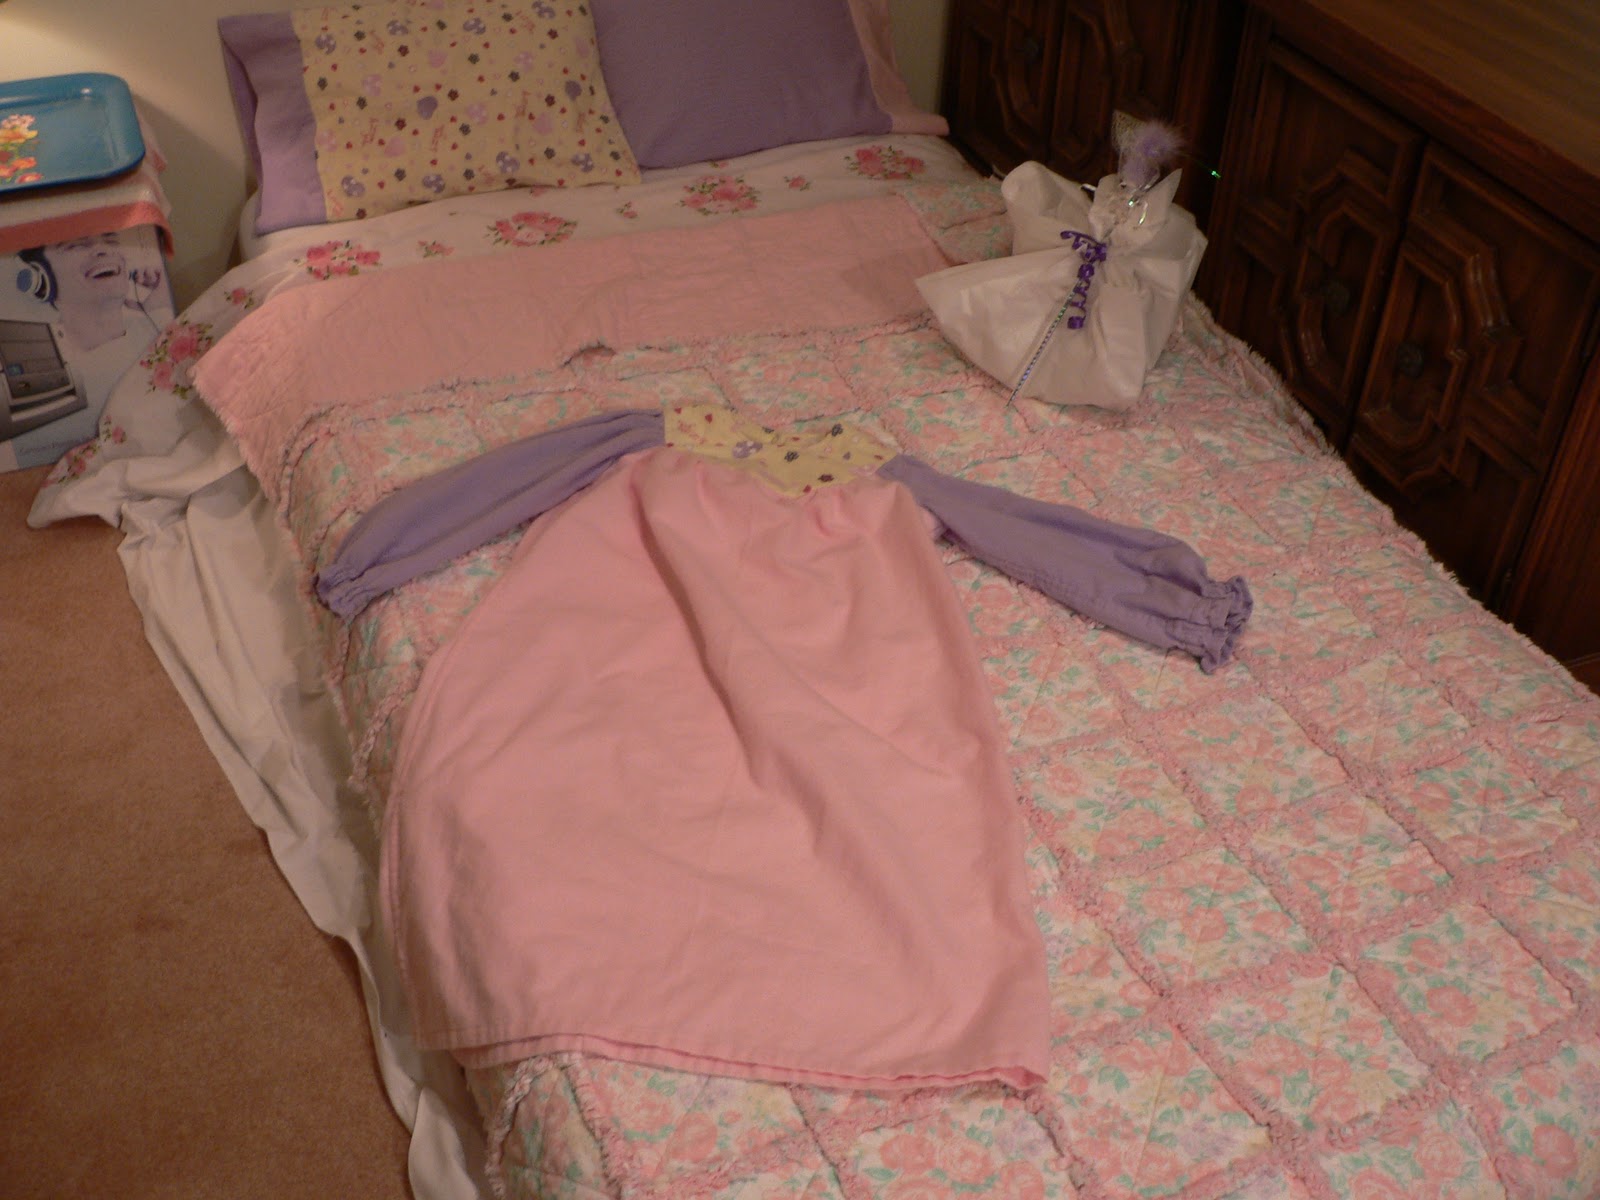
This is the gown I made for the grandaughter.  I also made the matching pillow slips and a shaggy Quilt for her bed (we put a mattress on the carpet when they are here).

This is the grandson's Jammie's, pillowcases and matching shaggy.  The packages on the bed are gifts for the first night here.

Here they are dressed and ready for bed.  I was so glad they fit.  I had to guess at their sizes.

Jammies are fun and easy to make.  Something the kids enjoy.  Try your hand at a pair.  Remember to flat fell the seams.  Makes them more comfortable because they don't have raveling seams itching them.

In the following blog you will find a tutorial on flat felled seams.

Other blogs I write:
Where I have stories of my cats and other pets 
a blog about my courtship with my husband,
and a blog about my most embarrassing moment.
New Blog Feb 17 on label reading.

blogs about the wildflowers on our farm
Organic methods we use, some cooking and some poetry
New blog Feb 16 about Seeds sprouting 


All recipes, pictures, and writings are my own. 
I give credit for items which belong to other people in my blogs .  Please do not copy without permission